
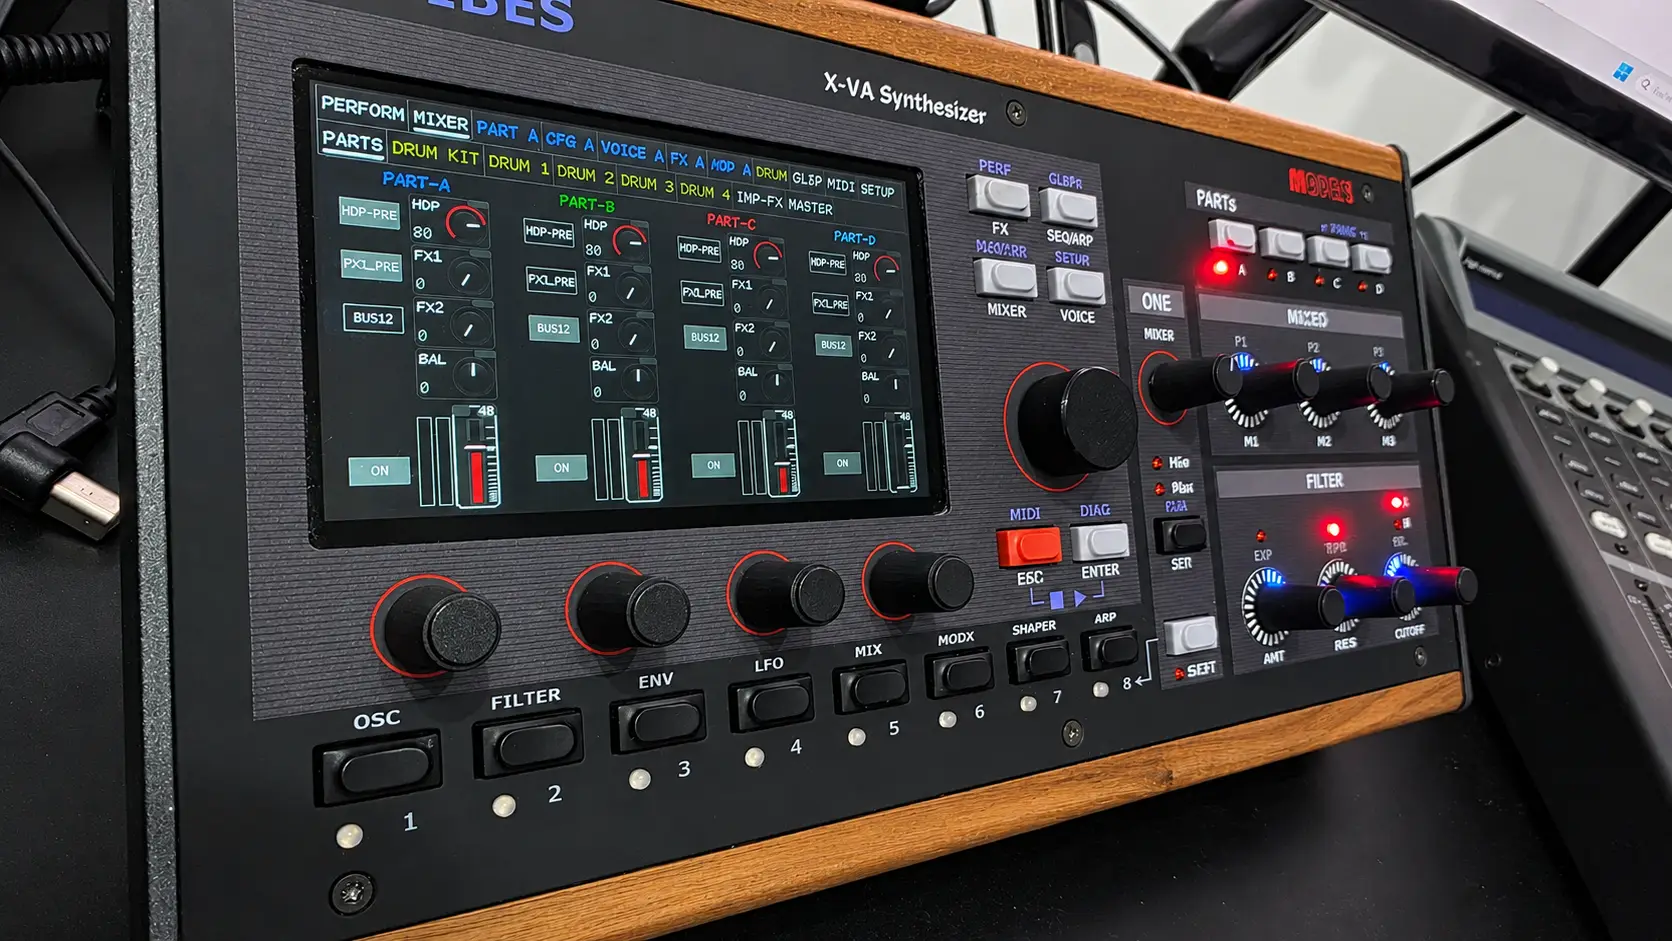
The MD850’s internal mixer handles 19 separate channels at once, and that depth is exactly why new owners get lost in it. Four synth parts, fourteen drum instruments, and a stereo audio input all pass through one on-screen console, each with its own level, routing, and effect sends. Miss one button and a channel goes silent for no obvious reason.
This walkthrough unpacks the whole mixer, one layer at a time. You’ll learn how the 19 channels are grouped, how to move through the eight menu pages, what every channel-strip control actually does, and how the trickier systems fit together: sidechain ducking, the FX stacks, split mono channels, and master limiting. By the end, the “complex” mixer should feel like a map you can read.
Key Takeaways
- The MD850 mixer sums 19 channels: 4 stereo synth Parts (A–D), 14 individual drum instruments, and 1 stereo audio input (MD850 documentation, 2026).
- The mixer is split across 8 menu pages: PARTS, DRUM KIT, DRUM 1 to DRUM 4, INP-FX, and MASTER.
- The BUS12 button is the single most common cause of a silent channel: switch it off and that channel never reaches the master output.
- A hidden sidechain bus sums any drums you flag, then feeds the DYNAMIC compressor on a synth Part to create pumping and ducking.
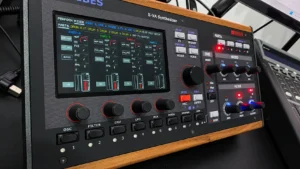
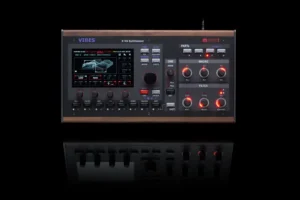
The internal mixer is a fully digital console that aggregates every internal and external sound the MD850 produces across 19 channels (MD850 documentation, 2026). It isn’t a physical fader wall. It’s a menu-driven mixer you navigate on screen, and that’s the first thing that trips people up. There are no visible knobs to grab, so the routing lives in buttons and pages instead.
Complexity comes from density, not difficulty. Nineteen channels is a lot to fit on a small display, so the MD850 spreads them across several pages and hides a few advanced buses (like the sidechain bus) out of the main view. Once you know which page holds what, the fog clears fast.
Here’s a mental model that helps: think of the mixer in three tiers. Tier one is the sources: your parts, drums, and input. Tier two is the per-channel controls: level, mute, routing, and sends. Tier three is the shared destinations: the FX stacks, the sidechain bus, and the master output. Every button you’ll meet belongs to one of those three tiers.
According to the MD850 documentation, the mixer’s purpose is to clarify signal routing, control logic, and bus architecture for users who find its depth confusing. In other words, the manual itself acknowledges the learning curve, so if you’ve felt lost, you’re not alone, and the layout is more logical than it first appears.
The 19 channels break into three source groups: 4 synth Parts, 14 drum instruments, and 1 stereo audio input (MD850 documentation, 2026). Each group behaves a little differently, so knowing which is which tells you where to look when you want to change a sound.
The four synth Parts (labeled A, B, C, and D) are stereo channels, one per main sound engine. The fourteen drum channels come from the Drum Sample Player: kick, snares, hats, and the rest, each on its own strip so you can balance them individually. The last channel is an external stereo input that you can process and blend with the internal sounds.
The MD850 mixer routes 19 channels from three sources into one output stage: four stereo synth Parts, fourteen individual drum instruments, and one stereo audio input (MD850 documentation, 2026). Because the drums dominate the channel count, most of your mixing time will be spent balancing that section, which is why it gets several dedicated pages.
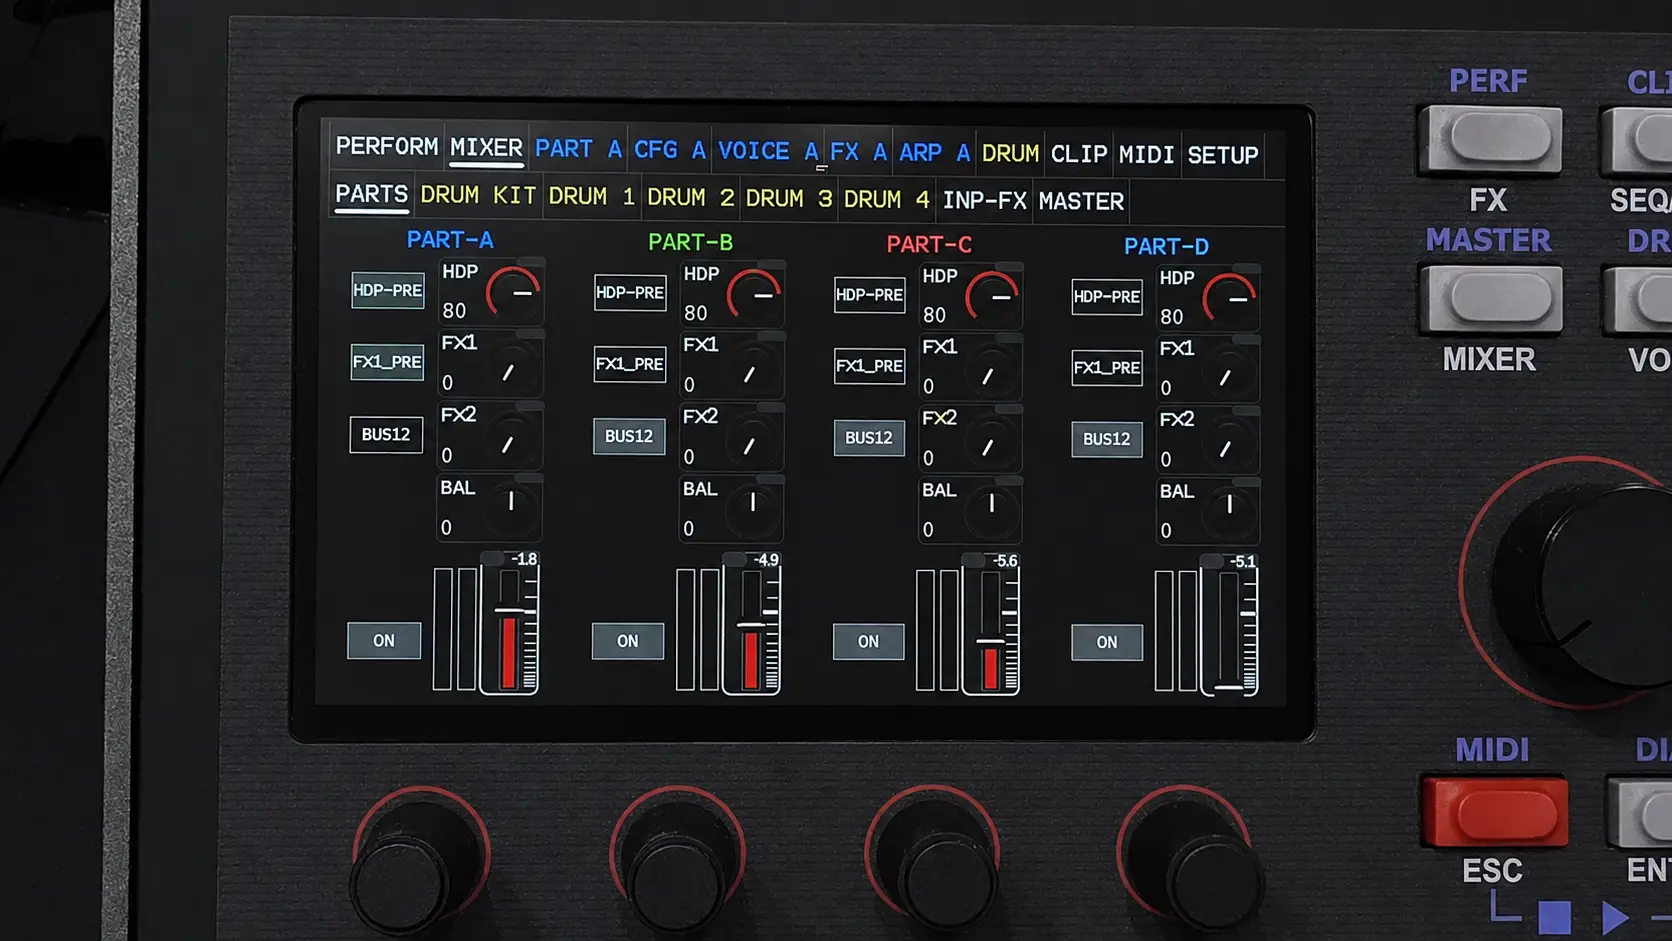
The mixer interface is organized into 8 sub-pages so all 19 channels stay reachable on one screen (MD850 documentation, 2026). Each page groups a related set of channels or destinations, and stepping through them in order is the fastest way to learn the layout.
Here’s what lives on each page:
The MD850 spreads its mixer across eight pages (PARTS, DRUM KIT, four DRUM pages, INP-FX, and MASTER), so each screen shows a manageable slice of the 19 channels (MD850 documentation, 2026). Once you memorize that a drum lives on one of the DRUM pages and effect returns live on INP-FX, you’ll stop hunting for controls.
Practical tip: treat the eight pages as a fixed left-to-right journey: sources first (PARTS, DRUM KIT, DRUM 1–4), then processing (INP-FX), then the final stage (MASTER). Following that order mirrors how the audio itself flows, so the mental map and the signal path line up.
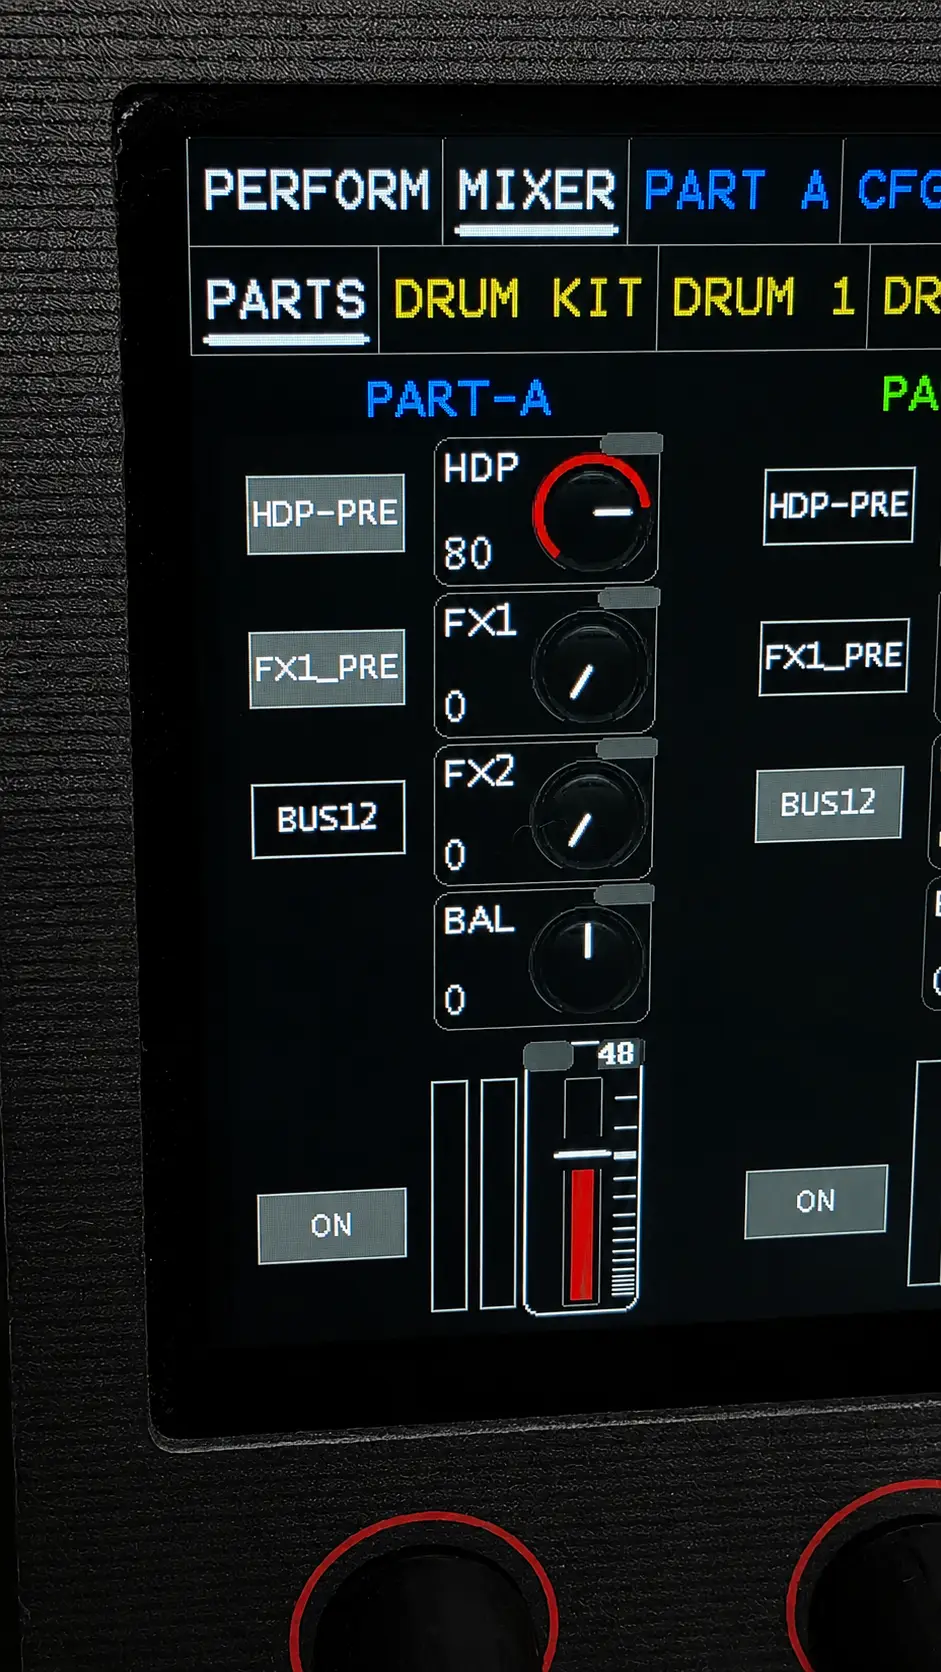
Every channel strip shares a common set of controls, and the two most important ones for a beginner are the Main Level slider and the BUS12 routing button (MD850 documentation, 2026). Get comfortable with these before you touch anything else. They decide whether a channel is heard at all, and how loudly.
The Main Level slider sets a channel’s gain from −∞ dB up to +6 dB, and it’s non-linear, with indicators every 3 dB (MD850 documentation, 2026). Non-linear means the slider gives you fine control around the important levels rather than a flat, even sweep. Those 3 dB markers are your reference points when you’re matching one channel to another.
BUS12 is the switch that connects a channel to the main output. If you deactivate BUS12, that channel’s signal will not reach Master Out 1/2. It simply drops out of your mix. This is the single control most likely to leave a beginner staring at a channel that shows activity but makes no sound.
On the MD850, the Main Level slider runs from −∞ to +6 dB with a non-linear taper and 3 dB indicators, while the BUS12 button determines whether the channel reaches the master bus at all (MD850 documentation, 2026). Level answers “how loud,” while BUS12 answers “does it play.” These are two different questions that beginners often confuse.
The stereo-placement control runs from −100% (full left) to +100% (full right), and its label changes with the channel mode (MD850 documentation, 2026). On a normal stereo channel it acts as a Balance knob (BAL), shifting the mix between the left and right sides. On a split mono channel, it becomes a true Pan knob (PAN) that places the individual mono signal anywhere in the stereo field before it hits the buses.
That distinction matters more than it sounds. Balance trims an existing stereo image; panning positions a mono source from scratch. So if you’ve split the audio input to mono (covered later), each side gets its own PAN to spread two instruments across the field.
Each channel also has a dedicated Mute button (labeled ON: blue when the channel is live, dark gray when muted), plus three Send knobs (HDP, FX1, and FX2) that each range from 0% to 100% (MD850 documentation, 2026). On an input channel, Mute stops the signal reaching any bus; on an output channel, it kills the final output. The send knobs decide how much of the channel’s signal is routed to the headphone mix, the FX1 bus, and the FX2 bus respectively: 0% sends nothing, 100% sends the entire signal. We’ll unpack what “pre” versus “post” does to those sends next.
Two buttons on the channel strip, HDP PRE and FX1 PRE, control whether a send is taken before or after the Main Level slider (MD850 documentation, 2026). This pre/post choice is one of the most misunderstood parts of the mixer, so it’s worth slowing down here.
Start with HDP PRE (Headphone Pre-Fader). When it’s ON, the signal is sent to your headphones before the Main Level slider, so moving that slider won’t change the headphone volume at all. When it’s OFF, the headphone level follows the slider, exactly like the main output does. Pre-fader is what lets you cue or monitor a channel independently of the mix.
FX1 PRE works the same way for the FX1 effect bus. With it ON, the amount of signal feeding the FX1 bus is taken before the channel’s main volume slider; with it OFF, the send follows the slider. Post-fader sends keep your reverb or delay proportional to the channel’s level. Pull the fader down and the effect fades with it. Pre-fader sends stay constant regardless of the fader.
On the MD850, HDP PRE and FX1 PRE each tap the signal before the Main Level slider when active, so the send stays fixed even as you move the fader; switch them off and the send tracks the fader instead (MD850 documentation, 2026). If your headphone level or effect amount refuses to change when you move a slider, a PRE button is almost certainly the reason.
Which should you use? For a monitor or headphone cue, pre-fader gives you a stable signal to listen to. For reverb and delay that should breathe with the performance, post-fader (PRE off) usually feels more natural.
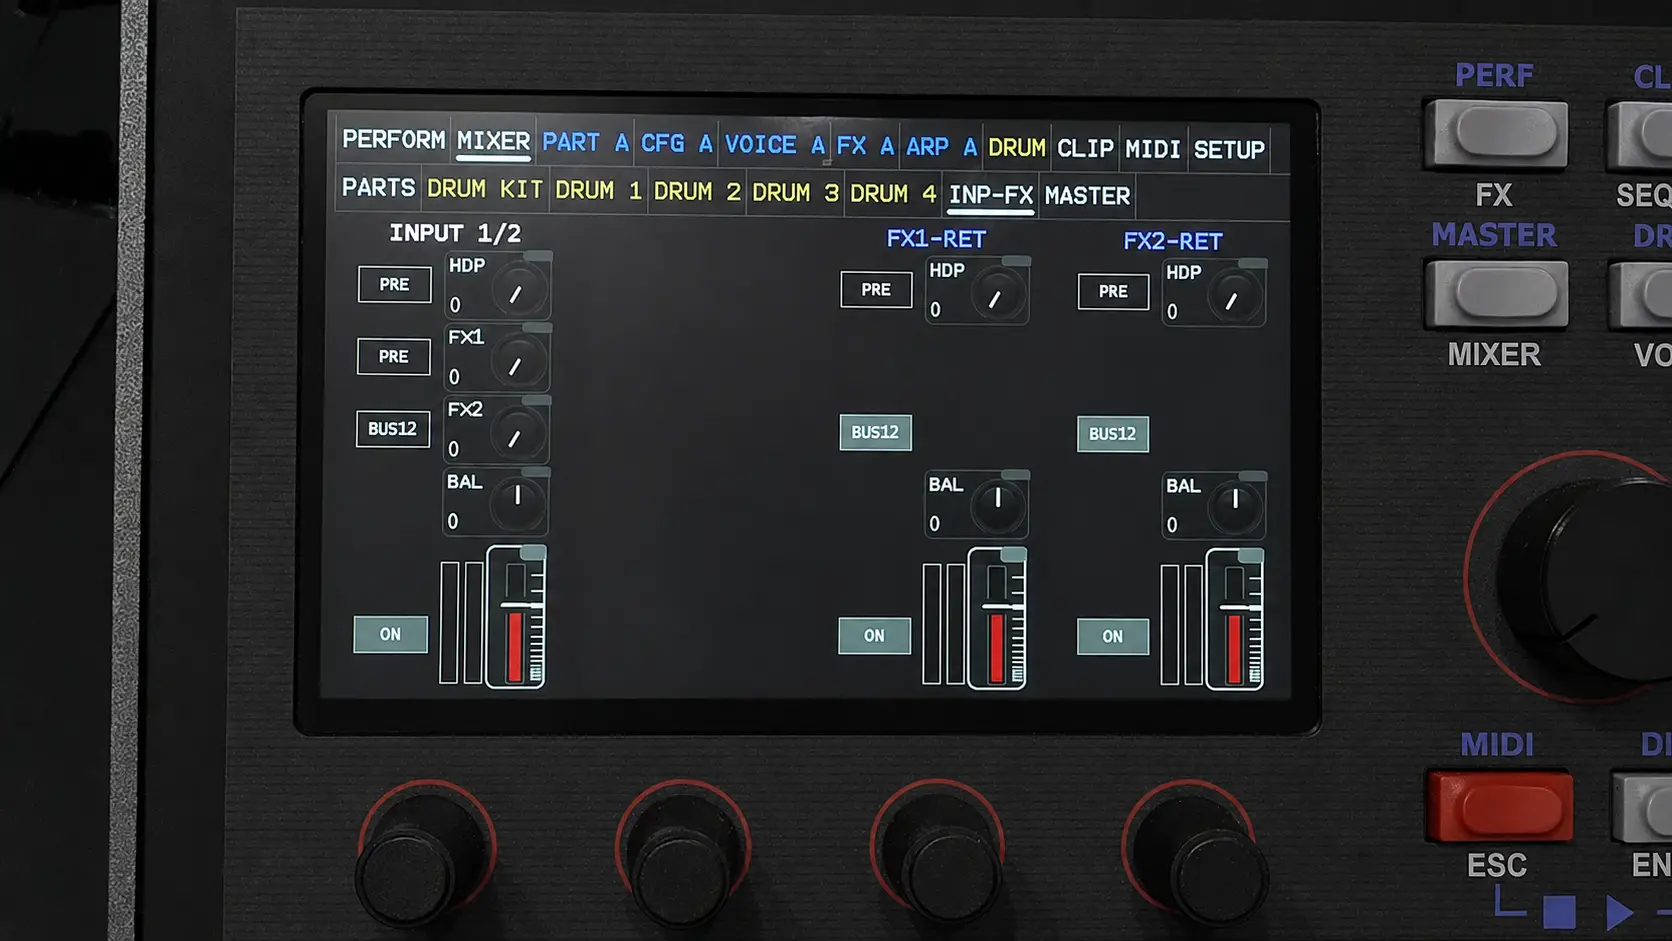
The MD850 includes two global Effect Stacks, FX1 and FX2, that any of the 19 channels can feed through their Send knobs (MD850 documentation, 2026). These are separate from the effects built into each synth Part. They’re shared, mixer-wide processors that live on their own buses.
The routing is a loop. Each channel’s FX1 and FX2 send knobs push signal onto the FX1 and FX2 buses. Those buses feed the effect stacks, and the processed output comes back into the mixer through the FX1-RET and FX2-RET return channels on the INP-FX page. From there, the wet signal is mixed back in with everything else.
There’s one important safety rule: the global effects cannot send signal to their own buses, which prevents runaway feedback loops (MD850 documentation, 2026). So you can’t accidentally route FX1’s return back into FX1 and create a screaming loop. The mixer blocks that path for you.
The MD850’s two effect stacks receive signal from the FX1 and FX2 buses via each channel’s send knobs, process it, and return it through dedicated FX1-RET and FX2-RET channels on the INP-FX page, with self-feeding explicitly blocked (MD850 documentation, 2026). Because the returns are ordinary channels, you can level, mute, and route your effect returns just like any source.
A subtle payoff of this design: since the FX returns are full channels on INP-FX, you can push a return’s own FX2 send to layer one effect into another (say, feeding a delay return into a reverb), as long as you don’t loop a stack back onto itself.
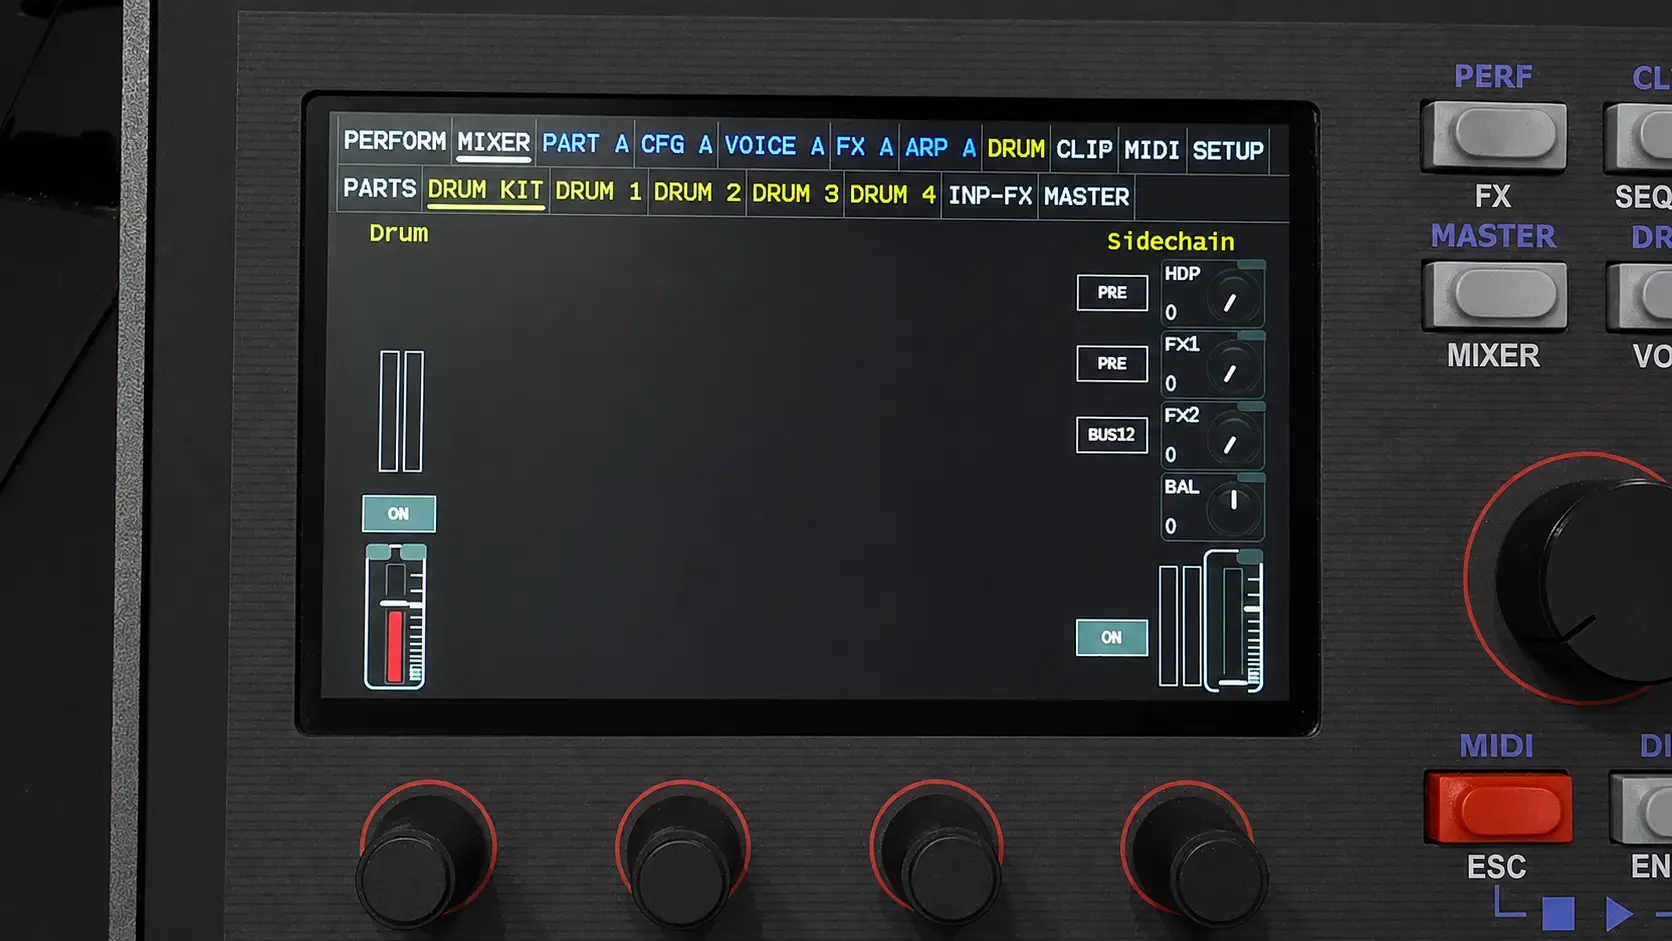
The Sidechain Bus is a hidden mixer bus that sums every drum instrument whose Sidechain parameter is turned up (MD850 documentation, 2026). You won’t see it as a normal channel. It works behind the scenes as a trigger source, and it’s the key to that classic pumping, ducking sound.
Here’s the chain in plain terms. First, you raise the Sidechain parameter on the drums you want as triggers, usually the kick. Those drums get summed onto the sidechain bus. Then, on a synth Part, the DYNAMIC compressor uses that bus as its trigger. Every time the kick hits, the compressor ducks the Part’s volume, and you hear the mix “breathe” in time with the drums.
The MD850’s sidechain bus collects all drums with their Sidechain parameter raised, then feeds the DYNAMIC (compressor) effect on other Parts to create ducking or pumping effects (MD850 documentation, 2026). This is how you get a pad or bass that pulses under a four-on-the-floor kick, a staple of house, techno, and modern pop.
The Group Control on the DRUM KIT page pairs nicely here: it lets a single slider attenuate or amplify all 14 drum instruments at once (MD850 documentation, 2026), so you can balance the whole kit against your sidechained synths without touching each drum individually.
Beginner gotcha: if your ducking effect sounds weak or absent, check two things: that at least one drum actually has its Sidechain parameter raised (an empty bus triggers nothing), and that the DYNAMIC compressor is active on the target Part. The bus is only a trigger; the compression happens on the receiving channel.
Both the Audio Input and the Master Output channels offer a Split capability that turns one stereo channel into two independent mono channels (MD850 documentation, 2026). This is an advanced routing trick, but it’s simple to trigger and genuinely useful once you understand it.
In Stereo Mode, the left and right signals are processed together with one set of controls: a single Level, Mute, and Limiter govern both sides. That’s the default, and it’s what you want most of the time.
Tapping the channel name switches it to Mono Mode, splitting it into two separate channels. For the audio input, this lets you treat the left and right inputs as two completely independent sound sources, each with its own panning (MD850 documentation, 2026). Notice the effect on the placement control too: what was a Balance knob (BAL) in stereo mode becomes a dedicated Pan knob (PAN) on each mono side, so you can spread the two sources anywhere across the field. Plug two different instruments into the L and R inputs, split to mono, and you’ve got two discrete channels to mix.
The MD850 lets you split the stereo audio input or master output into two independent mono channels by tapping the channel name, giving each side its own controls and, for the input, individual panning (MD850 documentation, 2026). For the output, splitting means you can use Bus 1 and Bus 2 for different purposes: for example, sending one bus to a separate physical output for a hardware effect or a second monitor feed.
When would a beginner reach for this? The most common case is a two-input recording setup: a mic on L, a groovebox on R, split to mono, and mixed as two separate channels rather than one glued stereo pair.
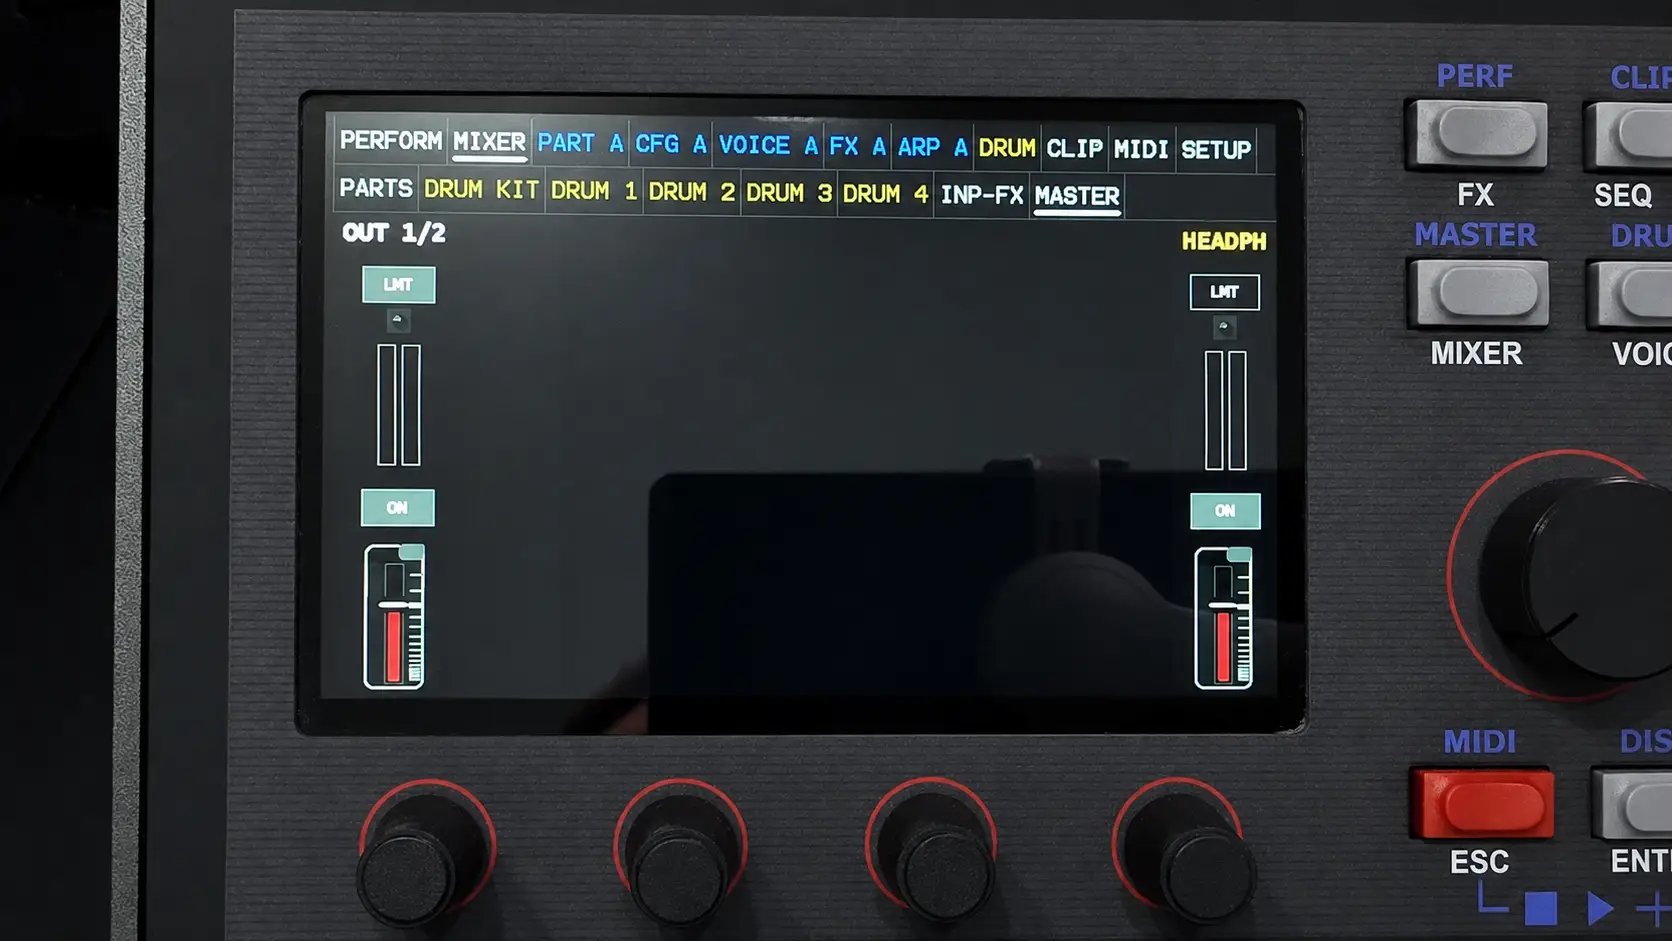
The Master Output includes a Limiter (LMT) that begins compressing at 0 dB and prevents harsh digital clipping at the +6 dB ceiling (MD850 documentation, 2026). It’s your last line of defense against distortion, and for a beginner it’s a set-and-forget safety net worth leaving on.
Digital clipping is unforgiving. Once a signal exceeds the ceiling, it distorts abruptly rather than softening like analog gear. The master limiter watches for signals crossing 0 dB and reins them in before they reach that +6 dB hard limit. Switch the limiter off and the signal simply clips at +6 dB instead (MD850 documentation, 2026), so leaving it on gives you a louder, safer mix without the crackle of overload.
On the MD850, the master Limiter engages at 0 dB and holds the signal below the +6 dB clipping ceiling, protecting the final stereo output from digital distortion (MD850 documentation, 2026). Combined with the per-channel level control, it gives you two stages of gain safety: manage headroom on each channel, then let the limiter catch anything that still peaks too hot.
The MASTER page also carries the usual essentials: a dedicated Mute button (every channel, group, and output has one) and control over the Headphone output alongside OUT 1/2. If you split the master to mono, remember Bus 1 and Bus 2 can then serve different destinations.
Most “the MD850 is broken” moments trace back to a handful of mixer settings, and the top offender is a deactivated BUS12 button cutting a channel off from the master output (MD850 documentation, 2026). Before you assume hardware trouble, run through this quick checklist.
First: no sound from a channel? Check BUS12 is active. With it off, the channel never reaches Master Out 1/2, no matter how high the level. Then confirm the channel isn’t muted, and that its Main Level slider isn’t parked at −∞.
Second: headphone volume won’t change when you move the fader? That’s HDP PRE doing its job. When HDP PRE is ON, the headphone send is pre-fader, so the slider has no effect on what you hear in the cans. Switch it off if you want the headphones to follow the mix.
Third: effect send feels stuck? Check FX1 PRE. A pre-fader send stays constant regardless of the channel fader, which can feel “broken” if you expected the reverb to fade with the level. Turn PRE off for a post-fader send that tracks the fader.
On the MD850, three settings cause most beginner confusion: BUS12 (silent channels), HDP PRE (headphone level that won’t follow the fader), and FX1 PRE (effect sends that stay fixed). All three are working as designed, not malfunctioning (MD850 documentation, 2026). Learn to check these first and you’ll troubleshoot in seconds.
The fastest way to internalize this mixer is to make one deliberate pass through all eight pages with a simple loop playing. Solo each source, watch how BUS12, the sends, and the PRE buttons change what you hear, and set up one sidechain from your kick to a pad. Fifteen minutes of hands-on exploration will cement more than an hour of reading.
The most likely cause is the BUS12 button being deactivated. On the MD850, if BUS12 is off, the channel’s signal never reaches Master Out 1/2, so you hear nothing despite visible activity (MD850 documentation, 2026). Check BUS12 first, then mute state and the Main Level slider.
The MD850 internal mixer sums 19 channels: 4 stereo synth Parts (A–D), 14 individual drum instruments from the Drum Sample Player, and 1 stereo audio input (MD850 documentation, 2026). These are spread across eight menu pages, from PARTS through MASTER.
HDP PRE sets the headphone send to pre-fader. When ON, the signal goes to your headphones before the Main Level slider, so moving the slider won’t change the headphone volume (MD850 documentation, 2026). When OFF, the headphone level follows the slider like the main mix.
Raise the Sidechain parameter on the drums you want as triggers, usually the kick. Those drums sum onto the hidden sidechain bus, which feeds the DYNAMIC compressor on a synth Part to duck its volume on each hit (MD850 documentation, 2026). The compressor must be active on the target Part.
Yes. Tapping the input channel’s name switches it from stereo to mono mode, splitting L and R into two independent channels, each with its own panning (MD850 documentation, 2026). This lets you treat two different instruments plugged into L and R as separate sources.
The MD850’s 19-channel mixer looks intimidating only until you see its structure. Once you group the channels into synth Parts, drums, and input, learn the eight pages, and understand the handful of buttons that actually control routing, the whole console becomes readable.